UITableViewを使ってみる
最終更新日:2015-05-23
UITableViewの基本的な使い方を紹介します。まだこの時点ではタップイベントなどは実装しません。
UITableViewとUITableViewCellを配置する
ViewControllerにUITableViewと、その配下にUITableViewCellを配置します。UITableViewCellは1行分のレイアウト定義を保持するものです。
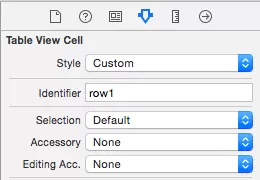
UITableViewCellにIdentifierをつける
1行分のレイアウト定義は複数作成できるので、UITableViewCellにそれぞれIdentifierをつけます。UITableViewCellを選び、右上のAttributes inspectorでIdentifierをつけます。
UITableViewのdataSourceをViewControllerにする
UITableViewの「データ」をどこからとってくるかを指定します。AndroidであればsetAdapter()に相当します。UITableViewを選び、右上のConnections inspectorでdataSourceを探し、ViewControllerにひも付けます。
ViewControllerにUITableViewDataSourceを実装する
ここからはswiftコード側での作業です。dataSourceとしてViewControllerを使用するので、ViewControllerにUITableViewDataSourceをつけます。
class MainListViewController : UIViewController, UITableViewDataSource {
    // 中身は省略
}
UITableViewDataSource protocolは最低でも次の2メソッドを実装しなければなりません。
- func tableView(tableView: UITableView, numberOfRowsInSection section: Int) -> Int
- func tableView(tableView: UITableView, cellForRowAtIndexPath indexPath: NSIndexPath) -> UITableViewCell
1つ目はリストの行数を返すメソッドで、2つ目は引数で渡された位置に対応するUITableViewCellオブジェクトを返すためのメソッドです。AndroidのAdapterクラスだとgetCount()とgetView()メソッドですね。メソッド名が微妙なのはObjective-CでtableView:numberOfRowsInSection:とtableView:cellForRowAtIndexPathというメソッド名だったから だとおもわれます。
numberOfRowsInSectionはここでは適当な行数を返すことにします。
func tableView(tableView: UITableView, numberOfRowsInSection section: Int) -> Int {
    return 15;
}
cellForRowAtIndexPathでは、次のようにdequeueReusableCellWithIdentifier()メソッドでIdentifierを指定し、UITableViewCellオブジェクトを取得します。
func tableView(tableView: UITableView, cellForRowAtIndexPath indexPath: NSIndexPath) -> UITableViewCell {
    let cell = tableView.dequeueReusableCellWithIdentifier("row1") as! UITableViewCell;
    return cell
}
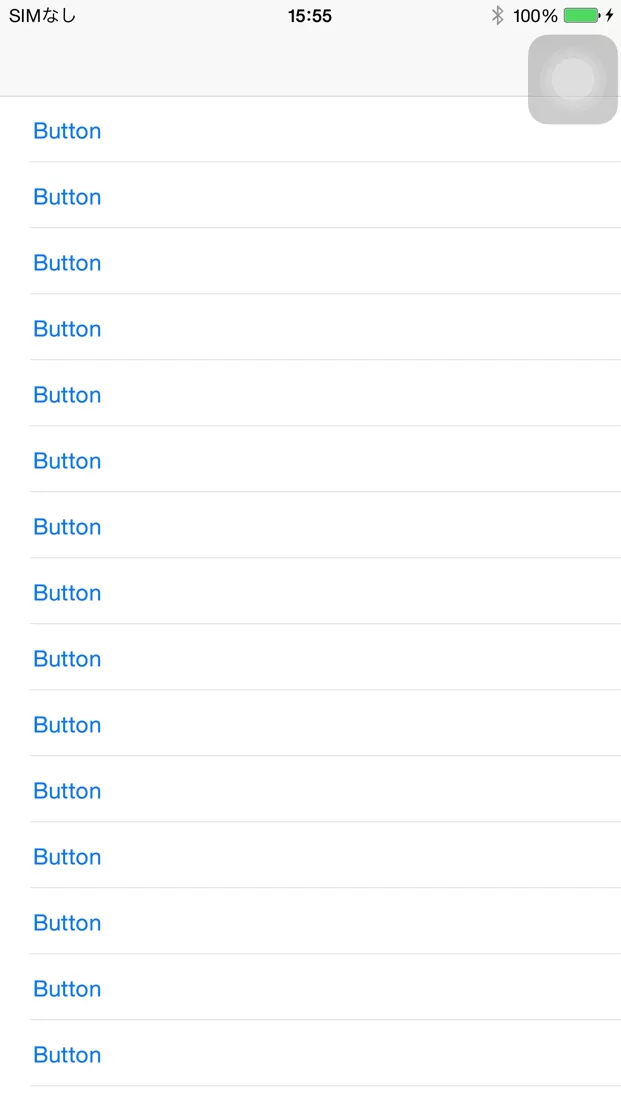
実行すると、次のようにリスト表示されました。


